零知WIFI教程-http WEB服务器示例
HTTP web server作为ESP8266的一个常用功能,在这里使用零知开源平台进行该示例的演示。
一、软件和硬件
硬件我们本次使用零知-ESP8266;
软件使用零知开发工具,自带示例:
二、方法步骤
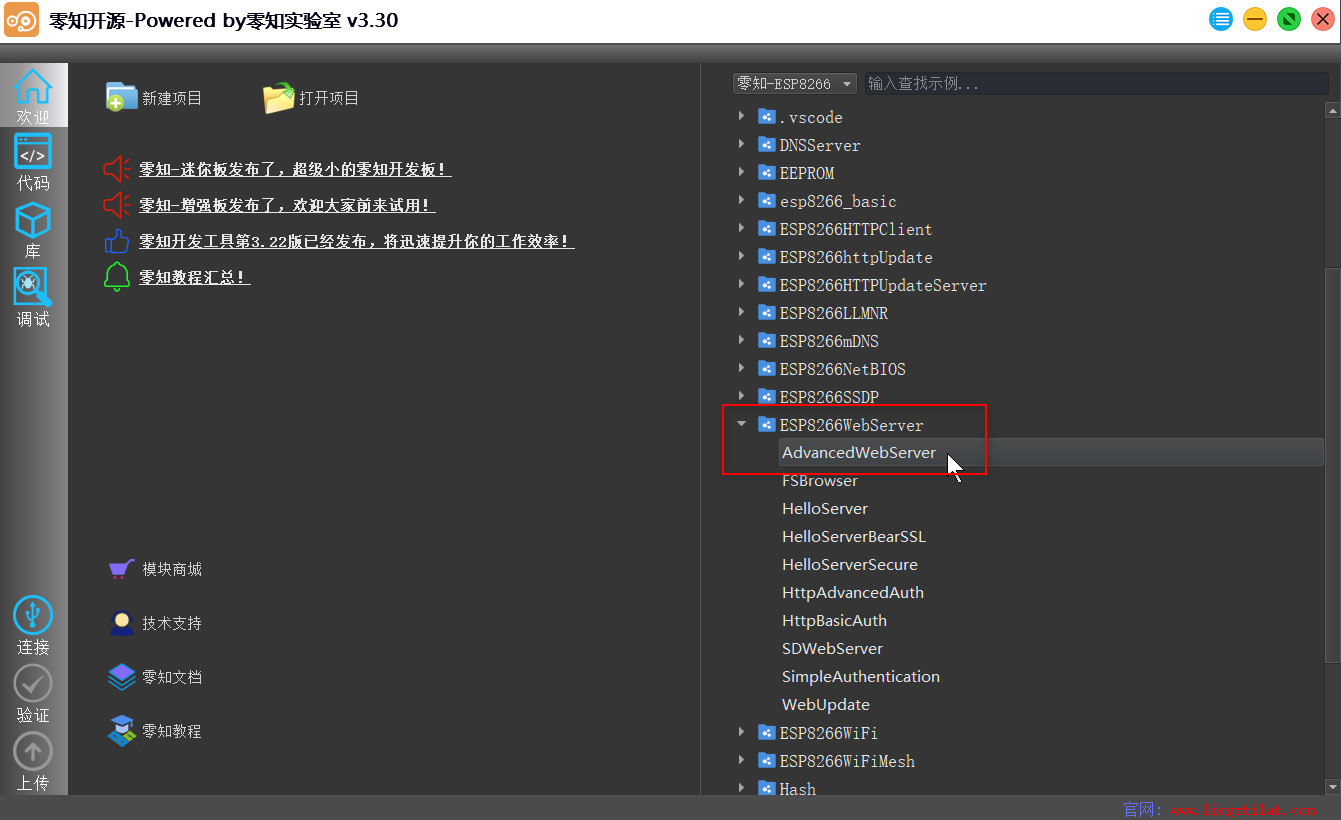
(1)先在零知开发工具中打开AdvancedWebServer示例,或者复制下面的代码到零知开发工具中:
/**************************************************************************************
* 文件: \ESP8266WebServer(Web服务器)\AdvancedWebServer(web服务器)\AdvancedWebServer.ino
* 作者:零知实验室
* -^^- 零知开源,让电子制作变得更简单! -^^-
* 时间: 2019-11-18 09:08:48
* 说明:
****************************************************************************************/
#include "ESP8266WiFi.h"
#include "WiFiClient.h"
#include "ESP8266WebServer.h"
#include "ESP8266mDNS.h"
#ifndef STASSID
#define STASSID "ssid" //这里填写你的热点名称
#define STAPSK "passwd" //这里填写你的热点密码
#endif
const char *ssid = STASSID;
const char *password = STAPSK;
ESP8266WebServer server(80); //创建一个ESP8266网络服务器实例 ,串口默认为80
const int led = 13;
/**************************************************************************************
* 描述: 处理根目录
* 参数: 无
* 返回值: 无
***************************************************************************************/
void handleRoot() {
digitalWrite(led, 1);
char temp[400];
int sec = millis() / 1000;
int min = sec / 60;
int hr = min / 60;
snprintf(temp, 400,
"<html>
<head>
<meta http-equiv='refresh' content='5'/>
<title>ESP8266 Demo</title>
<style>
body { background-color: #cccccc; font-family: Arial, Helvetica, Sans-Serif; Color: #000088; }
</style>
</head>
<body>
<h1>Hello from ESP8266!</h1>
<p>Uptime: %02d:%02d:%02d</p>
<img src="/test.svg" />
</body>
</html>",
hr, min % 60, sec % 60
);
server.send(200, "text/html", temp);
digitalWrite(led, 0);
}
/**************************************************************************************
* 描述: 没有找到页面处理
* 参数: 无
* 返回值: 无
****************************************************************************************/
void handleNotFound() {
digitalWrite(led, 1);
String message = "File Not Found\n\n";
message += "URI: ";
message += server.uri();
message += "\nMethod: ";
message += (server.method() == HTTP_GET) ? "GET" : "POST";
message += "\nArguments: ";
message += server.args();
message += "\n";
for (uint8_t i = 0; i < server.args(); i++) {
message += " " + server.argName(i) + ": " + server.arg(i) + "\n";
}
server.send(404, "text/plain", message);
digitalWrite(led, 0);
}
void setup(void) {
pinMode(led, OUTPUT); //初始化LED
digitalWrite(led, 0); //给LED 写入一个低电压
Serial.begin(115200); //设置串口打印的波特率
//WiFi模块的设置
WiFi.mode(WIFI_STA);
WiFi.begin(ssid, password);
Serial.println("");
// 等待WiFi连接
while (WiFi.status() != WL_CONNECTED) {
delay(500);
Serial.print(".");
}
Serial.println("");
Serial.print("Connected to ");
Serial.println(ssid);
Serial.print("IP address: ");
Serial.println(WiFi.localIP());
// 启动MDNS响应程序
if (MDNS.begin("esp8266")) {
Serial.println("MDNS responder started");
}
//启动HTTP服务器
server.on("/", handleRoot);
server.on("/test.svg", drawGraph);
server.on("/inline", []() {
server.send(200, "text/plain", "this works as well");
});
server.onNotFound(handleNotFound);
server.begin();
Serial.println("HTTP server started");
}
void loop(void) {
server.handleClient();
MDNS.update();
}
/**************************************************************************************
* 描述: 绘制图像
* 参数: 无
* 返回值: 无
****************************************************************************************/
void drawGraph() {
String out = "";
char temp[100];
out += "\n";
server.send(200, "image/svg+xml", out);
}
(2)验证上述代码并上传到零知-ESP8266开发板;
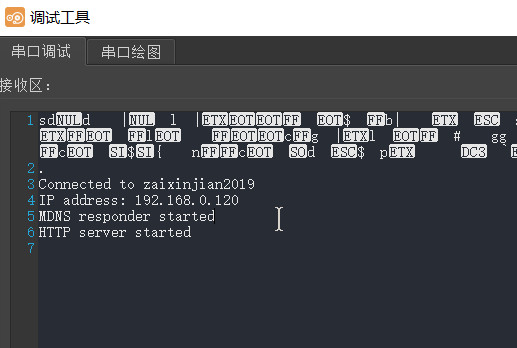
(3)我们打开零知开发工具的串口调试窗口,可以看到如下信息:
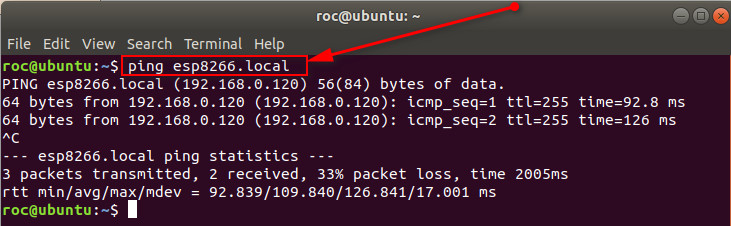
(4)现在我们用ping工具测试下网络,得到如下信息:
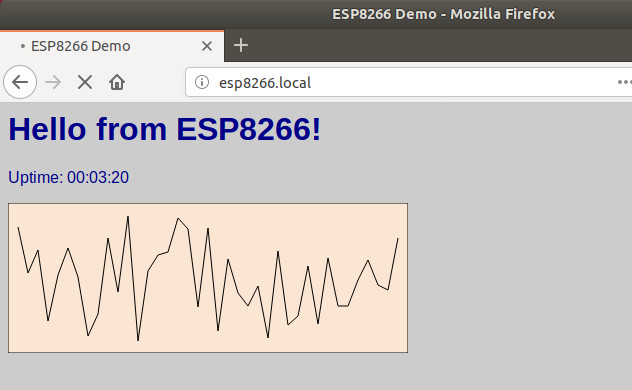
(5)上述步骤成功后,我们现在打开浏览器,打开网址:http://esp8266.local ,可以看到如下信息: