STATION模式下WIFI UDP协议通信示例
本帖主要讲解ESP8266 WIFI功能关于UDP协议网络传输的应用,这里演示了ESP8266在STATION模式下UDP通信的示例:
一、软件和硬件
硬件我们本次使用零知-ESP8266;
二、方法步骤
(1)先在零知开发工具中复制下面的代码到零知开发工具中:
/**********************************************************
* 文件: esp8266-udp-clinet.ino by 零知实验室([url=http://www.lingzhilab.com]www.lingzhilab.com[/url])
* -^^- 零知开源,让电子制作变得更简单! -^^-
* 时间: 2019/06/17 11:01
* 说明:
************************************************************/
#include <ESP8266WiFi.h>
#include <WiFiUDP.h>
#define SSID "xx"
#define PSSWD "xx"
unsigned int UDPPort = 8888; // local port to listen on
char packetBuffer[255]; //buffer to hold incoming packet
char replyBuffer[] = "send-back-ack"; // a string to send back
WiFiUDP Udp;
// 复位或上电后运行一次:
void setup() {
//在这里加入初始化相关代码,只运行一次:
Serial.begin(115200);
WiFi.mode(WIFI_STA);
WiFi.begin(SSID, PSSWD);
while (WiFi.status() != WL_CONNECTED) {
Serial.print('.');
delay(500);
}
Serial.print("Connected! IP address: ");
Serial.println(WiFi.localIP());
Serial.printf("UDP server on port %d\n", UDPPort);
Udp.begin(UDPPort);
// Udp.beginPacket("192.168.4.1", UDPPort);//send ip to server
// char ipBuffer[255];
// WiFi.localIP().toString().toCharArray(ipBuffer, 255);
// Udp.write(ipBuffer);
// Udp.endPacket();
// Serial.println("Sent ip adress to server");
}
//一直循环执行:
void loop() {
// 在这里加入主要程序代码,重复执行:
// if there's data available, read a packet
int packetSize = Udp.parsePacket();
if (packetSize) {
Serial.print("Received packet of size ");
Serial.println(packetSize);
Serial.print("From ");
IPAddress remoteIp = Udp.remoteIP();
Serial.print(remoteIp);
Serial.print(", port ");
Serial.println(Udp.remotePort());
// read the packet into packetBufffer
int len = Udp.read(packetBuffer, 255);
if (len > 0) {
packetBuffer[len] = 0;
}
Serial.println("Contents:");
Serial.println(packetBuffer);
// send a reply, to the IP address and port that sent us the packet we received
Udp.beginPacket(Udp.remoteIP(), Udp.remotePort());
Udp.write(replyBuffer);
Udp.endPacket();
}
}
(2)将上面代码验证后并上传到零知ESP8266开发板中,然后打开串口调试窗口,可以看到如下信息:

上面显示了ESP8266的IP地址和端口号信息。
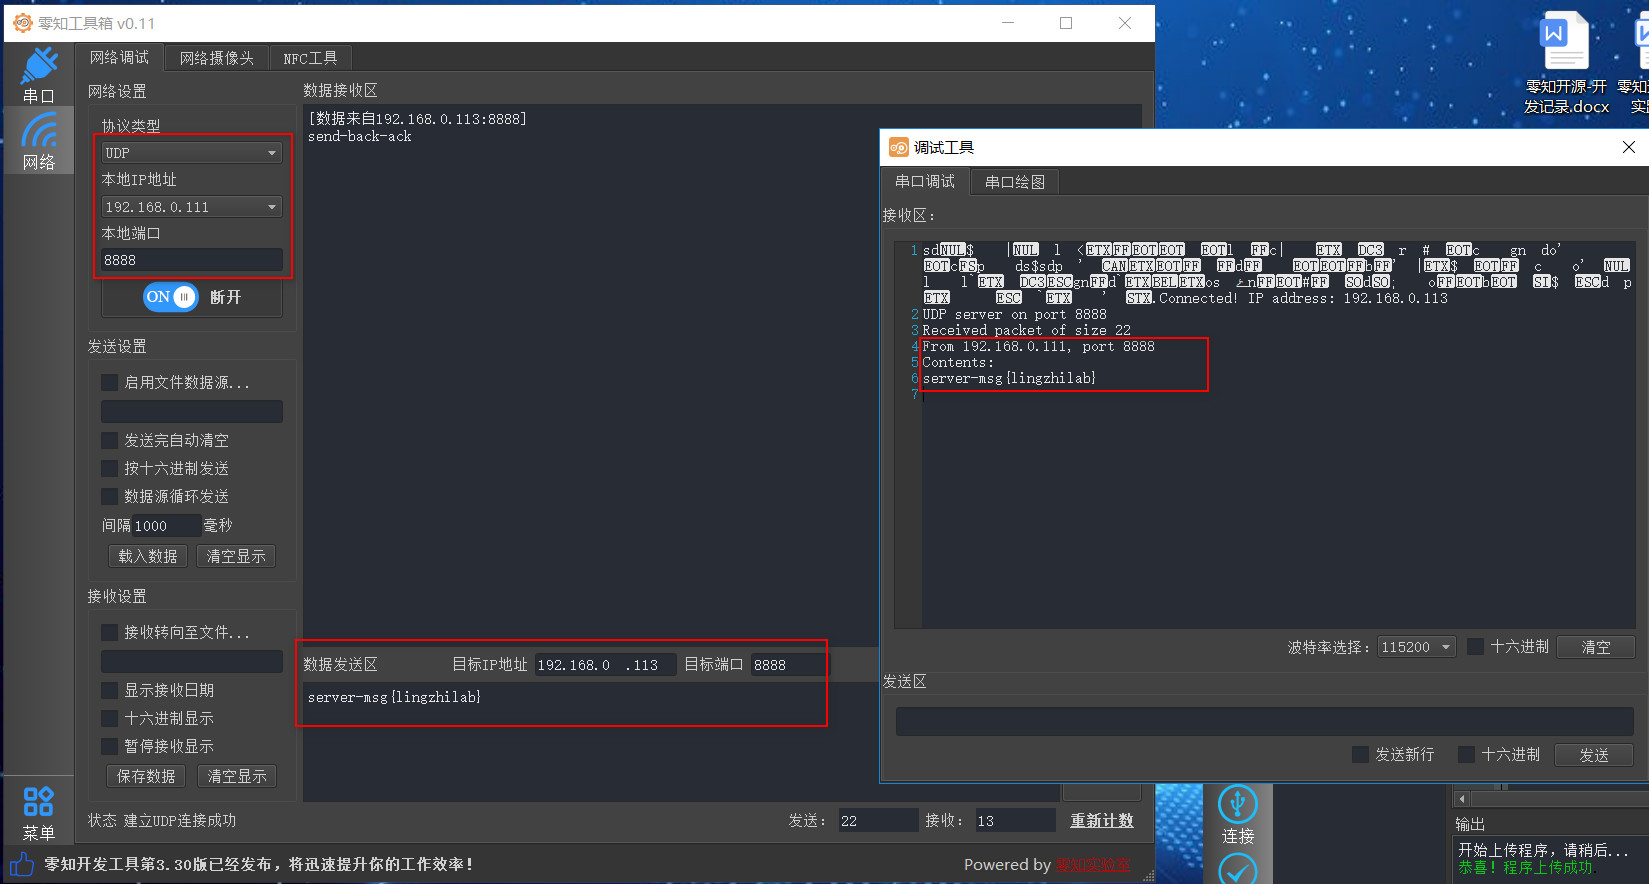
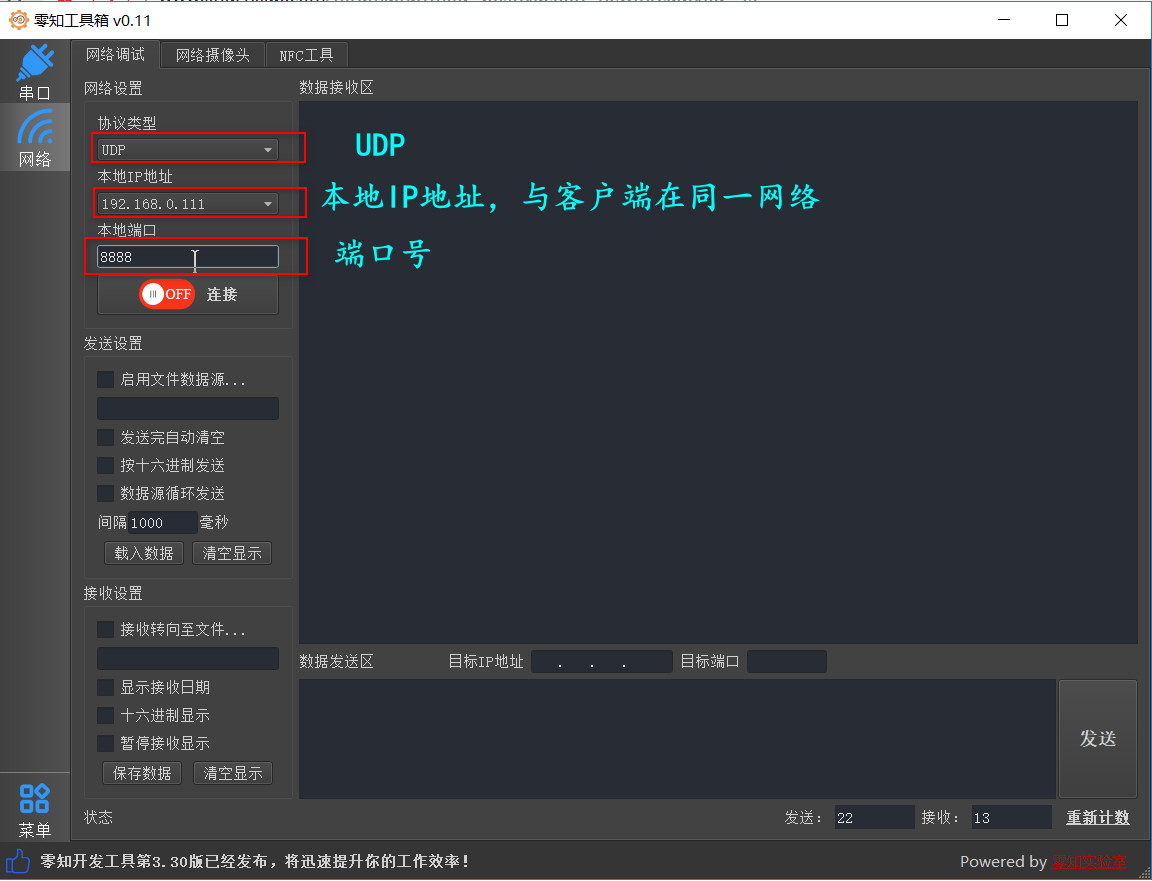
(3)现在打开零知工具箱(可以在“软件下载”页面下载),然后打开“网络调试”界面,选择UDP模式并选择UDP的IP和端口号,如下:
在零知工具箱中,点击【连接】,然后就可以和零知ESP8266开始通信了,我们在发送窗口填写发送的信息,点击【发送】,可以看到如下信息,表明通信双方成功: