创建Web服务器控制伺服电机
利用ESP32的WIFI模块,创建一个简单的网络服务器来控制伺服电机。
可以使用任何具有浏览器功能的设备访问要构建的网络服务器:本地网络上的智能手机,平板电脑,笔记本电脑等。
一、软件和硬件
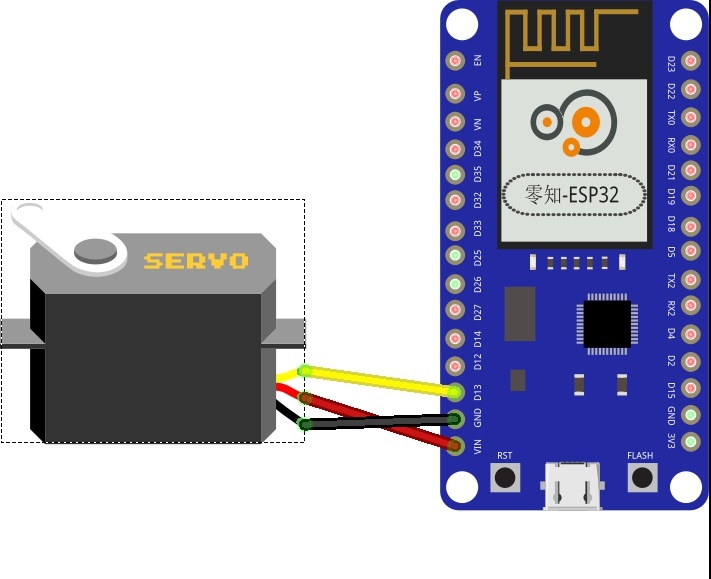
硬件我们本次使用零知-ESP32和伺服电机;
接线
二、方法步骤
#include <WiFi.h>
#include "Servo.h"
Servo myservo; // create servo object to control a servo
// twelve servo objects can be created on most boards
// GPIO the servo is attached to
static const int servoPin = 13;
// Replace with your network credentials
const char* ssid = "";
const char* password = "";
// Set web server port number to 80
WiFiServer server(80);
// Variable to store the HTTP request
String header;
// Decode HTTP GET value
String valueString = String(5);
int pos1 = 0;
int pos2 = 0;
void setup() {
Serial.begin(9600);
delay(1000);
myservo.attach(servoPin); // attaches the servo on the servoPin to the servo object
// Connect to Wi-Fi network with SSID and password
Serial.print("Connecting to ");
Serial.println(ssid);
WiFi.begin(ssid, password);
while (WiFi.status() != WL_CONNECTED) {
delay(500);
Serial.print(".");
}
// Print local IP address and start web server
Serial.println("");
Serial.println("WiFi connected.");
Serial.println("IP address: ");
Serial.println(WiFi.localIP());
server.begin();
}
void loop() {
WiFiClient client = server.available(); // Listen for incoming clients
if (client) { // If a new client connects,
Serial.println("New Client."); // print a message out in the serial port
String currentLine = ""; // make a String to hold incoming data from the client
while (client.connected()) { // loop while the client's connected
if (client.available()) { // if there's bytes to read from the client,
char c = client.read(); // read a byte, then
Serial.write(c); // print it out the serial monitor
header += c;
if (c == '\n') { // if the byte is a newline character
// if the current line is blank, you got two newline characters in a row.
// that's the end of the client HTTP request, so send a response:
if (currentLine.length() == 0) {
// HTTP headers always start with a response code (e.g. HTTP/1.1 200 OK)
// and a content-type so the client knows what's coming, then a blank line:
client.println("HTTP/1.1 200 OK");
client.println("Content-type:text/html");
client.println("Connection: close");
client.println();
// Display the HTML web page
client.println("<!DOCTYPE html><html>");
client.println("<head><meta name=\"viewport\" content=\"width=device-width, initial-scale=1\">");
client.println("<link rel=\"icon\" href=\"data:,\">");
// CSS to style the on/off buttons
// Feel free to change the background-color and font-size attributes to fit your preferences
client.println("<style>body { text-align: center; font-family: \"Trebuchet MS\", Arial; margin-left:auto; margin-right:auto;}");
client.println(".slider { width: 300px; }</style>");
client.println("<script src=\"http://www.lingzhilab.com/home/js/jquery.min.js\"></script>");
// Web Page
client.println("</head><body><h1>ESP32 with Servo</h1>");
client.println("<p>Position: <span id=\"servoPos\"></span></p>");
client.println("<input type=\"range\" min=\"0\" max=\"180\" class=\"slider\" id=\"servoSlider\" onchange=\"servo(this.value)\" value=\"" + valueString + "\"/>");
client.println("<script>var slider = document.getElementById(\"servoSlider\");");
client.println("var servoP = document.getElementById(\"servoPos\"); servoP.innerHTML = slider.value;");
client.println("slider.oninput = function() { slider.value = this.value; servoP.innerHTML = this.value; }");
client.println("$.ajaxSetup({timeout:1000}); function servo(pos) { ");
client.println("$.get(\"/?value=\" + pos + \"&\"); {Connection: close};}</script>");
client.println("</body></html>");
//GET /?value=180& HTTP/1.1
if (header.indexOf("?value=") >= 0) {
pos1 = header.indexOf('=');
pos2 = header.indexOf('&');
valueString = header.substring(pos1 + 1, pos2);
//Rotate the servo
myservo.write(valueString.toInt());
Serial.println(valueString);
}
// The HTTP response ends with another blank line
client.println();
// Break out of the while loop
break;
} else { // if you got a newline, then clear currentLine
currentLine = "";
}
} else if (c != '\r') { // if you got anything else but a carriage return character,
currentLine += c; // add it to the end of the currentLine
}
}
}
// Clear the header variable
header = "";
// Close the connection
client.stop();
Serial.println("Client disconnected.");
Serial.println("");
}
}
注意: 1、代码导入之后需要根据自己的本地网络在下面的两行代码中填写无线网名称和密码!
//找到下面两行填写WiFi名称和密码
const char* ssid = "";
const char* password = "";
2、需要导入伺服电机的库文件,见附件。
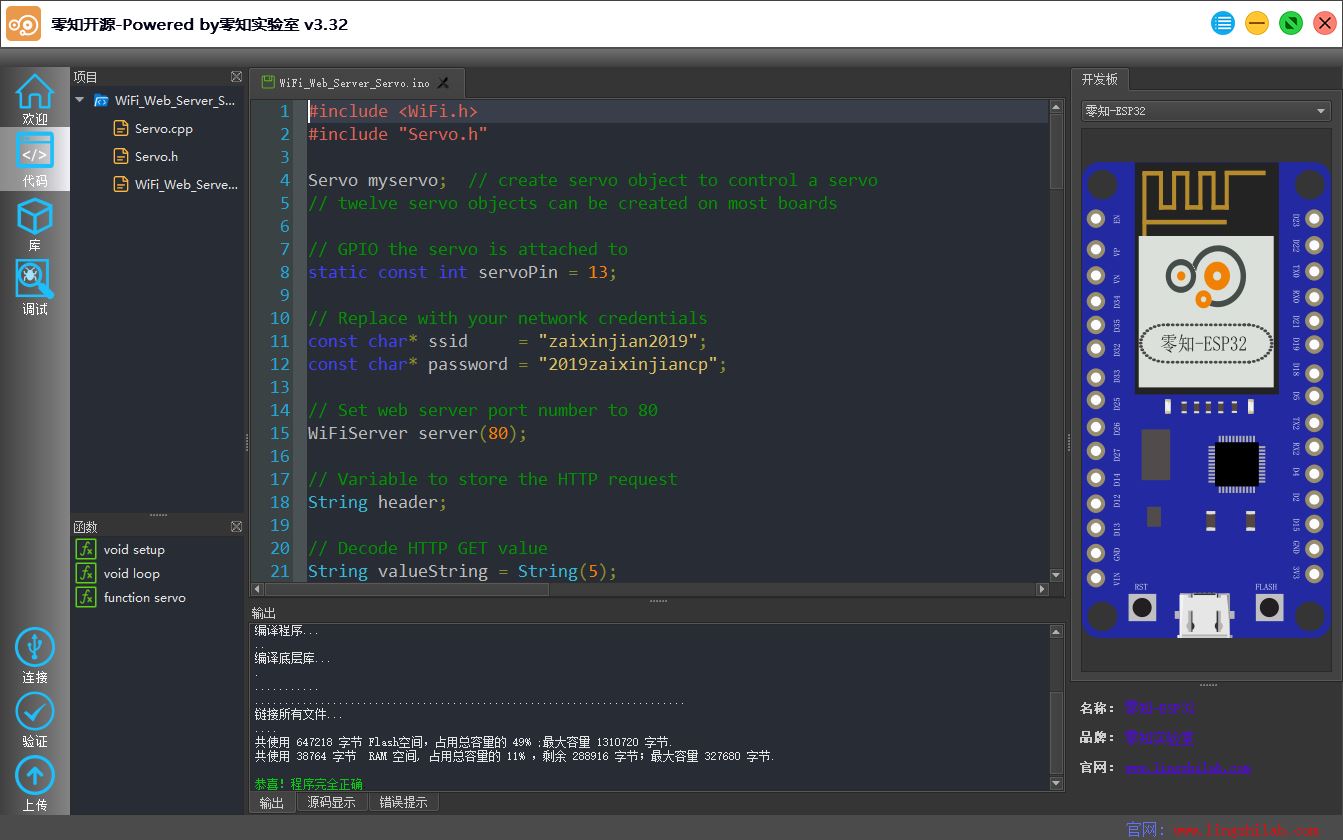
导入程序代码,在右侧选择ESP32开发板,然后验证程序,如图:
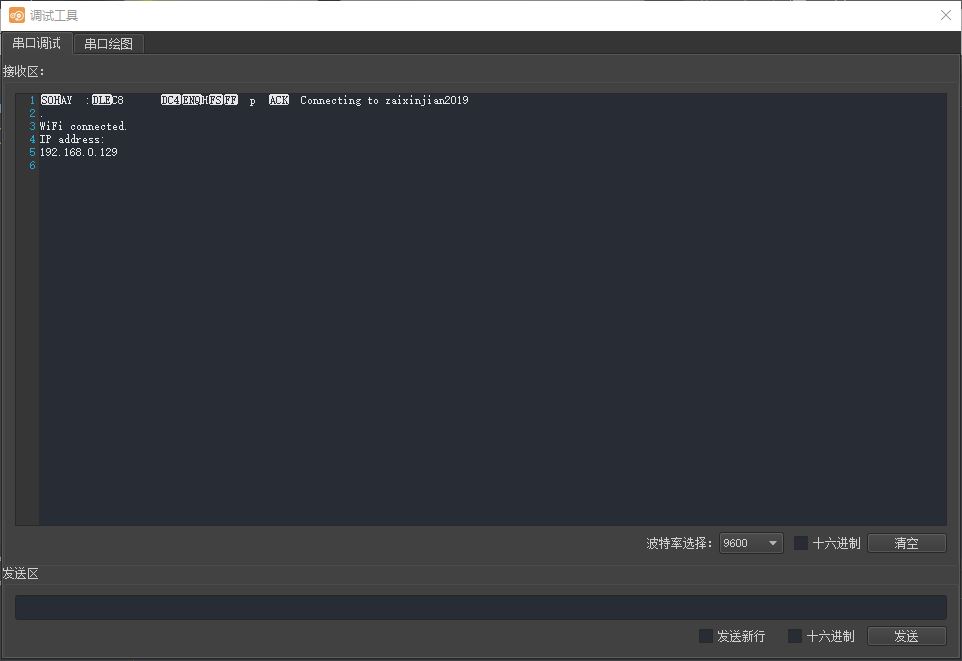
然后上传程序到开发板,打开串口调试窗口,可以看到WiFi已连接,且服务器创建成功,输出本地服务器地址:
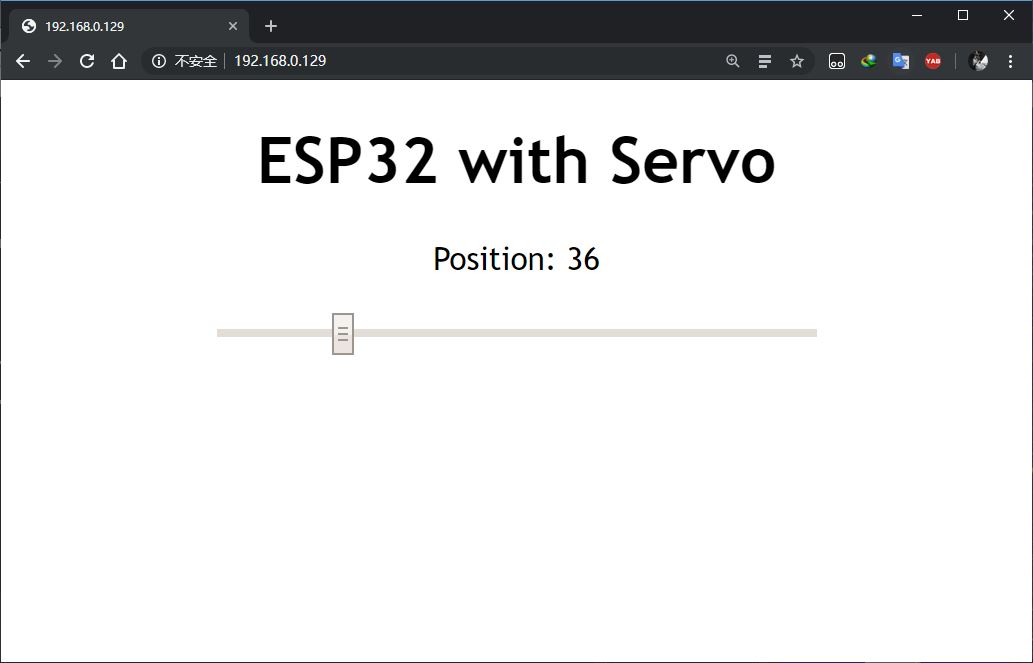
使用手机或者电脑的浏览器连接服务器,就能够控制使用滑块控制伺服电机的转动角度了,如图所示:

库文件:WiFi_Web_Server_Servo.zip(点击下载)